29 June 2014

Bow Tie

There is just something about a bow tie that I love.  So whipped some up!  Pretty much followed the pattern I found here.  I also bought some bow tie kits to make some of them adjustable.  There are so many great fabrics out there... now I just need someone to give them to!


Cheers!

03 June 2014

Brush Embroidery Cookies

Tried my hand again doing the brush embroidery technique.  Next time I will thin my royal icing a bit, so I might be able to see more of the brush strokes.  Was a touch too dry I believe.


So many beautiful examples out there, I will just keep at it!

27 April 2014

DeckOver Paint

Just applied the new DeckOver sold by Home Depot.

Here is a before shot.

 
The deck pressure washed.


After one coat of DeckOver.


This product requires 2 coats.  I have to go back for 2 more cans, but it already looks and feels so much better!  

You can choose from 54 colors with this product so it will match about anything!  I picked Pyramid color.

Will update again after the 2nd coat.

UPDATED:  2 coats.


Sunglasses Case

Made some sunglasses cases the other day.  I have been handing out as small gifts since most people could always use another case for some glasses!  I love mine and use it daily.

Followed the tutorial found here.


Reversible Headbands

Whipped up a bunch of these for K and N.  I like that they are reversible and that it used up a bunch of smaller stash fabric pieces.

I used the adult headband tutorial found here, but I used the kid size pattern of the actual headband piece from this German site found here.  I used the original adult elastic cover piece and the 5.5 inches of elastic and it fits perfectly for a 8 yr old and 10 yr old.


Happy sewing!

05 April 2014

Wood Stacker Toy

Just finished this baby shower gift.  I finished one with custom colored water based stain and another with soy paint.  I like that it's an fun & educational toy and can be used for years to come.  Many ways to finish off the blocks, so going to try soy paint for the next set.  I even like the plain natural look as well.


wood - 1" x 8" x 36"
paddle drill bit - 7/8" and 1 inch
dowel rod -  7/8" x 6 inches
stain or paint
sand paper

Cut blocks into the following sizes: 6", 5.5", 5", 4.5", 4", 3.5 and 3".

Once squares are cut use a ruler and pencil to draw a line from upper left corner to bottom right corner.  Rotate square 90 degrees and repeat.  You will now have a "X" on your block which is the exact center spot for you to drill your 1" holes.

Using 1-inch paddle drill bit, drill holes in all BUT the 6" block. 

The 6-inch block will be drilled with the 7/8" drill bit.  Do NOT drill all the way thru wood block.

Sand all pieces, center holes and round all edges.  The wood is satin smooth once I finished with all the sanding. 

I left the dowel natural and rubbed on  bee's wax.   I painted the blocks with a water based stain. 

Once everything was dry I used wood glue to insert the dowel into the 6-inch block and let dry 24 hours.

There is a great tutorial with many photos available here.  They even have a flower shape stacker.


22 March 2014

New Grout

Big job, but finally done with both bathrooms.  This product I found  is a game changer!  These "before" shots are actually of clean grout lines, but since the grout was old it had just become permanently stained.  I hated the way it looked.  Of course I would never purposely install 8 inch white square tile, but gotta work with what you got.


The grout had become light yellow in color.  Yucky.


I went to Home Depot and picked up a bottle of this stuff.  Grout Renew in Bright White.  I used a stiff, square tip 1/4-inch paint brush and went to work.  The bottle suggests a tooth brush but I wanted as little  mess as possible.  I also had a roll of toilet paper near by.  I used one square of toilet paper for each section I was cleaning up.  A paper towel would be too hefty, the TP was just right.  Once I applied it in the grout lines I then wiped along each side of the tile.  It dries fast so work in small areas. 


The "afters" are great!  Looks like brand new tile installation!


It has to dry for 24 hours and can't get wet for 72 hours.  The guest bath was done quickly, but had to do the Master in 3 separate stages, due to the shower and toilet closet.  I still wanted to be able to use portions of the master bath while I was doing this job.

It's a little back breaking to be hunched over for so long, but I just love the clean look.

17 January 2014

What does the Fox say...

Happy Valentines Day!!!  I personally don't love the song, but hey all the kids do!

Made a bunch of these for K to pass out to her 2nd grade class.


I used my Silhouette Cameo to cut out the red heart and white heart.  Used a hole punch for the eyes and a small black pom-pom for the Fox nose.


I used this pattern (sized down a bit) for the fox tail and ears.

16 January 2014

Felt Cupcake Pattern

I have made a huge stash of these and enjoy giving them out to people for their birthdays!  Of course they also go great with a felt Turtle or a felt Inchworm too!


I used wool felt for these.

Sorry no in process photos but pretty straight forward.


Trace pattern onto Freezer Paper.  Iron onto the felt colors of your choice.


I also cut out 2 - 1 1/4 inch card stock circle to use inside of the cupcake base to help it stand properly once you have stuffed it.

Cut out felt pieces.

Machine stitch or hand sew up the short side of the cupcake side piece.  I used about an 1/8" seam allowance.  Turn out the piece so raw seam will be inside the cupcake. 

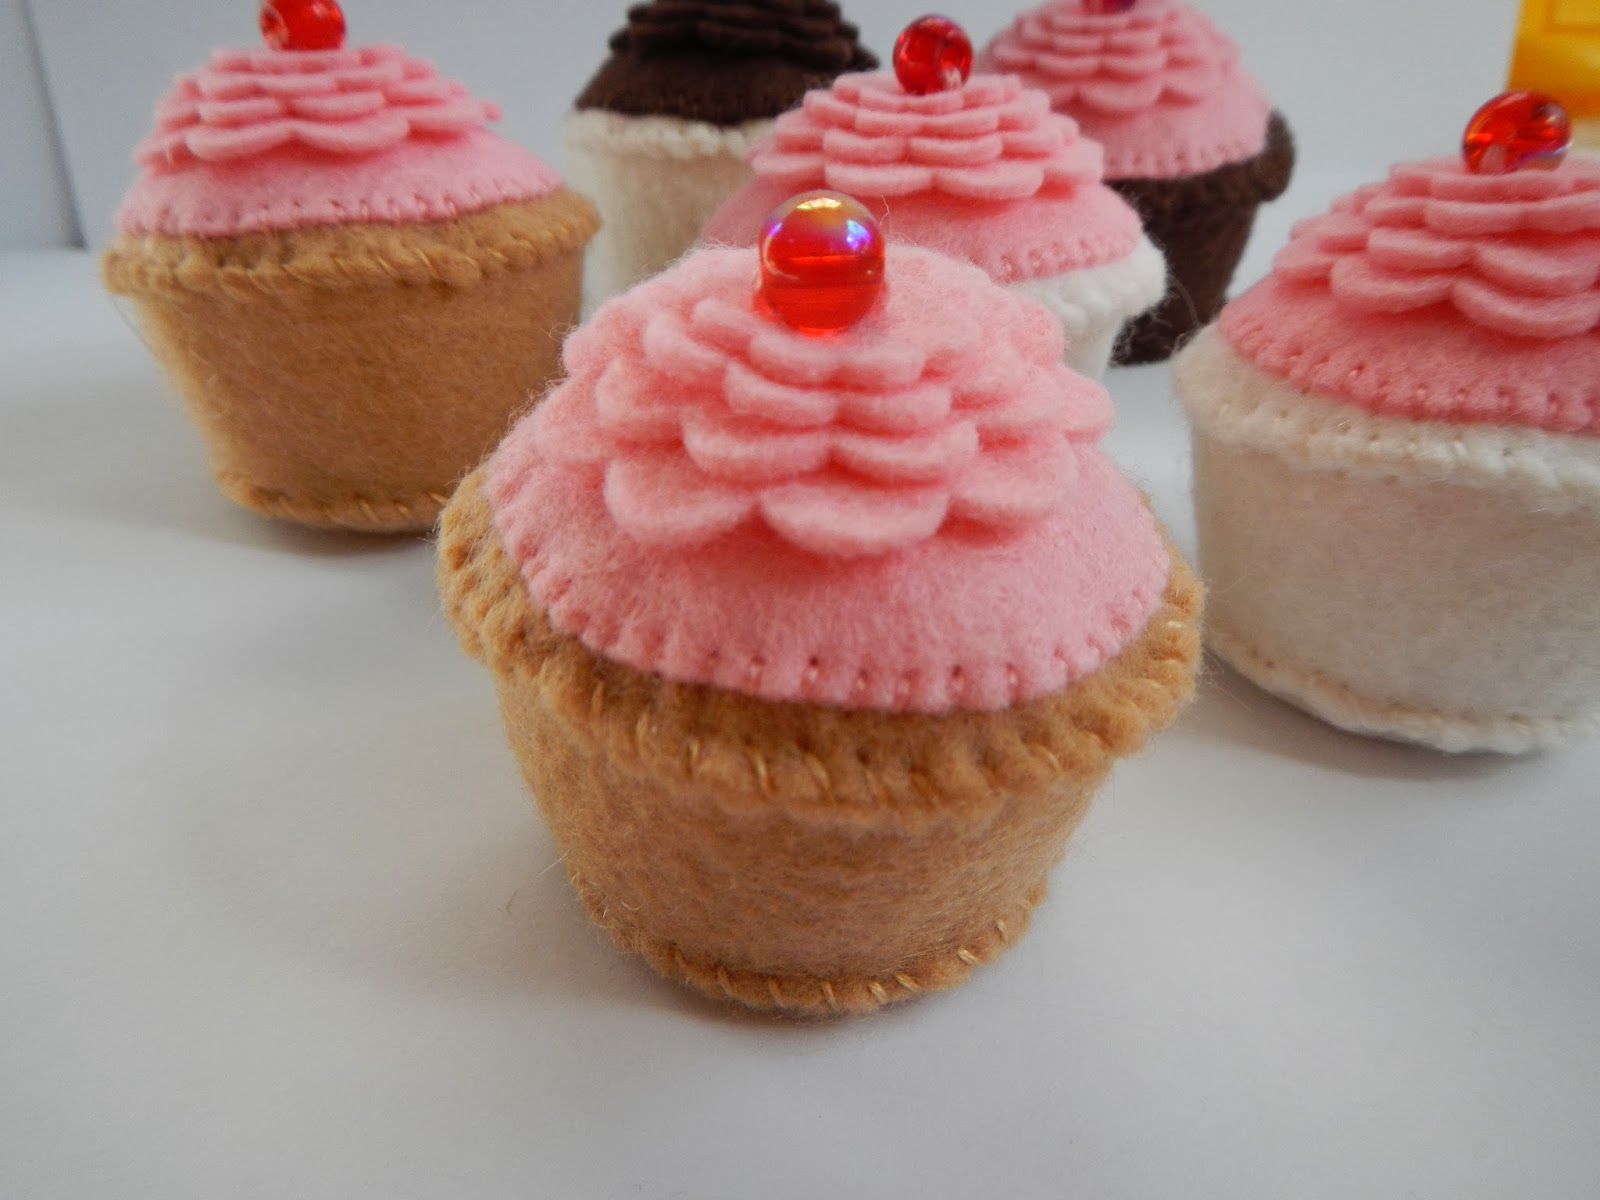
I used small flower dies and my Big Shot to cut out 4 graduated flowers to use as "frosting".


I placed a large bead on top of my stack of 4 flowers and using needle and thread, sewed through all the layers a couple times.

Then hand sewed the flower stack onto the cupcake frosting top.

Next whip stitch the frosting layers onto the cupcake top.

Now sew the cupcake top to the cupcake side using a whip stitch.

Sew cupcake base to cupcake side, leaving a small opening to stuff the cupcake.

Once cupcake is stuffed, slip in 2- 1 1/4 inch cardstock circles that have been glued or taped together.  This helps it stand upright and keep a flat bottom.

Sew the cupcake base closed.

 
Evelyn the Inchworm is a pattern from the book  "Wee Wonderfuls". 


Felt Turtle pattern can be found here.


08 January 2014

Felt Harry Potter

There is a lady in Spain who makes Harry, Ron and Hermione felt dolls.  I wish I could afford to buy all three from her!  But I had to settle and make my own.


K loved hers and her classmate who is a huge Potter fan, loved his as well!