16 January 2014

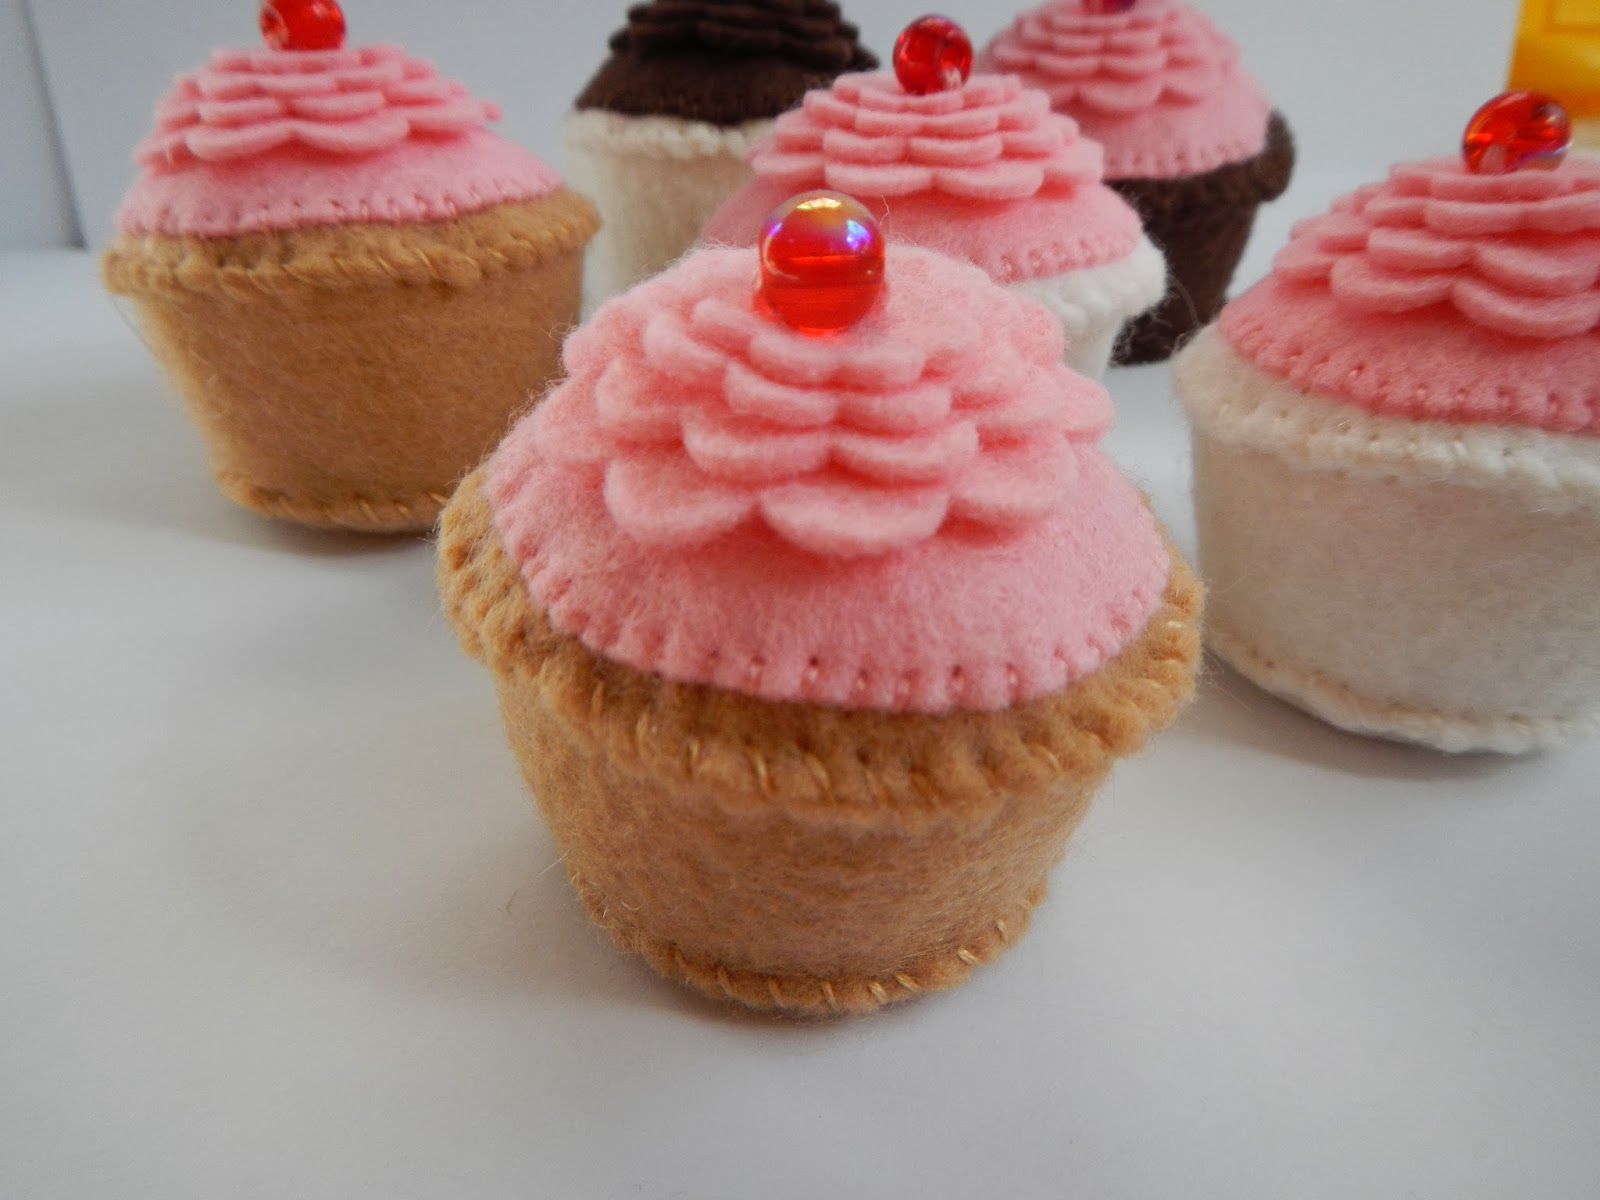
Felt Cupcake Pattern

I have made a huge stash of these and enjoy giving them out to people for their birthdays!  Of course they also go great with a felt Turtle or a felt Inchworm too!


I used wool felt for these.

Sorry no in process photos but pretty straight forward.


Trace pattern onto Freezer Paper.  Iron onto the felt colors of your choice.


I also cut out 2 - 1 1/4 inch card stock circle to use inside of the cupcake base to help it stand properly once you have stuffed it.

Cut out felt pieces.

Machine stitch or hand sew up the short side of the cupcake side piece.  I used about an 1/8" seam allowance.  Turn out the piece so raw seam will be inside the cupcake. 

I used small flower dies and my Big Shot to cut out 4 graduated flowers to use as "frosting".


I placed a large bead on top of my stack of 4 flowers and using needle and thread, sewed through all the layers a couple times.

Then hand sewed the flower stack onto the cupcake frosting top.

Next whip stitch the frosting layers onto the cupcake top.

Now sew the cupcake top to the cupcake side using a whip stitch.

Sew cupcake base to cupcake side, leaving a small opening to stuff the cupcake.

Once cupcake is stuffed, slip in 2- 1 1/4 inch cardstock circles that have been glued or taped together.  This helps it stand upright and keep a flat bottom.

Sew the cupcake base closed.

 
Evelyn the Inchworm is a pattern from the book  "Wee Wonderfuls". 


Felt Turtle pattern can be found here.


08 January 2014

Felt Harry Potter

There is a lady in Spain who makes Harry, Ron and Hermione felt dolls.  I wish I could afford to buy all three from her!  But I had to settle and make my own.


K loved hers and her classmate who is a huge Potter fan, loved his as well!

19 December 2013

Oreo Elf Shoes

Made some of these cute elf shoes, using red Oreos as the "tights".  They come together real quick.  Hardest part is finding the red Oreos!


I found the template here.  I decided to use pom-poms instead of bells for time sake.

Merry Christmas!


17 November 2013

Kiss Christmas Tree

Such an ingenious craft!  I am so glad I stumbled across this.  Perfect small gift to pass out this Christmas!  Kisses and Nugget bars.

Here is the great tutorial for this chocolate tree craft.  Click here.


Very easy to assembly line these.  I whipped up a lot this weekend.  Some people are just so amazing in their imagination and putting it out there for all to try!  Thanks Brenda Q.

16 November 2013

Felt Mayflower Boat

I saw these Mayflower boats in the Pottery Barn catalog about 3 years ago.  I knew right away I wanted these on my Fall decoration table and for the table on Thanksgiving day.

The pictures are really bad since we haven't seen the sun in days.

I made my own pattern and used wool felt to whip these up.  You can sew these different ways to save time as well.  Blanket stitch the sides or use your sewing machine.  The bottom has to be whipped stitch but it's quick and easy.


I bought some wooden spools and dowels at Hobby Lobby.  I stuffed a tiny bit of cotton into the spool before inserting the dowel for a nice snug fit.  Then painted it brown.


I fill the base of the boats with whole coffee beans.  I never drink coffee but I just love the smell of coffee beans!  Makes the kitchen smell so good.  The beans add weight and also hold up the sail.  You could  save a lot of money and just buy a bag of black beans also.


I have a couple sails made of vellum paper and the other 2 out of shimmer/pearl paper.

I included this years menu on one of the larger boats to set by the buffet table.


The large boat base is about 8 inches long and 5 inches high in the rear.  The large sail is 8 inches long by 6 inches wide. 

Here is the pattern for the large boat.


Cut out the pieces and sew up the sides first (whip, blanket stitch or sewing machine), then whip stitch the bottom piece into place.


Enjoy and Happy Thanksgiving!


05 October 2013

Franken Pop Covers

I originally saw these sucker covers from a blog.  It was a die to use in the Big Shot.  I decided to try and make my own template.  The basic design can be used over and over again for school functions and parties.


I cut out strips of green cardstock to be 6 1/4 inches long by 2 inches wide.

Score at: 1/2", 3", and 4".


Punch a hole centered on the 1/2" score line.  This is for the sucker stick.

I then cut out black pieces of cardstock to 2" x 1".  Then just cut out random jags of hair.

Using left over scraps of black cardstock cut out small triangles for the "bolts" on Frankensteins.


Using glue dots I put on 2 wiggle eyes.


Insert one Tootsie Pop and add a glue dot to the back flap to secure wrapper closed.


Click here to see the original Frankenstein and purchase the sucker wrapper die.
 
I put mine together different than the tutorial, just so you know and don't get confused.
 
 
Linked up with Skip To My Lou - Made by you Mondays.


04 October 2013

Disney Cruise Props

Had another successful Disney Cruise.  This year they added  Halloween activities and a costume party.  So at the last second I whipped up these wool felt Chip & Dale masks for the girls to wear during the Halloween party.


Chip and Dale LOVED seeing the girls in their masks!  They kept pointing to how everything was the same. 

I altered this pattern, found here


I also brought on board 2 white pillow cases that I ironed on a Disney Character patch.  It's so cool that all the Disney Princesses and Characters signed the pillow cases.  It was a nice surprise on our last night of cruising to come find these laying on our bed!


I made some treat boxes with a chocolate inside in order to thank them properly.  I slipped the treat boxes, pillow case and a pink sharpie into a Ziploc bag and the second we boarded gave it to guest services.  I will do one every time we go now.  Might do a photo mat next time.


For our Pirate Night I made the girls matching Mickey pirate hats.  I had bought some gold earrings and an eye patch as well.  Disney supplies each person with a  pirate bandanna, so they were all set for Pirate Night!


I found the pirate hat pattern here.  I enlarged it in order to fit an 8 yr old head.

Everything turned out great.   Between the treats for being prior Disney cruisers and my surprises I made, the girls were so excited to see what was waiting on our bed everyday!