22 March 2014

New Grout

Big job, but finally done with both bathrooms.  This product I found  is a game changer!  These "before" shots are actually of clean grout lines, but since the grout was old it had just become permanently stained.  I hated the way it looked.  Of course I would never purposely install 8 inch white square tile, but gotta work with what you got.


The grout had become light yellow in color.  Yucky.


I went to Home Depot and picked up a bottle of this stuff.  Grout Renew in Bright White.  I used a stiff, square tip 1/4-inch paint brush and went to work.  The bottle suggests a tooth brush but I wanted as little  mess as possible.  I also had a roll of toilet paper near by.  I used one square of toilet paper for each section I was cleaning up.  A paper towel would be too hefty, the TP was just right.  Once I applied it in the grout lines I then wiped along each side of the tile.  It dries fast so work in small areas. 


The "afters" are great!  Looks like brand new tile installation!


It has to dry for 24 hours and can't get wet for 72 hours.  The guest bath was done quickly, but had to do the Master in 3 separate stages, due to the shower and toilet closet.  I still wanted to be able to use portions of the master bath while I was doing this job.

It's a little back breaking to be hunched over for so long, but I just love the clean look.

17 January 2014

What does the Fox say...

Happy Valentines Day!!!  I personally don't love the song, but hey all the kids do!

Made a bunch of these for K to pass out to her 2nd grade class.


I used my Silhouette Cameo to cut out the red heart and white heart.  Used a hole punch for the eyes and a small black pom-pom for the Fox nose.


I used this pattern (sized down a bit) for the fox tail and ears.

16 January 2014

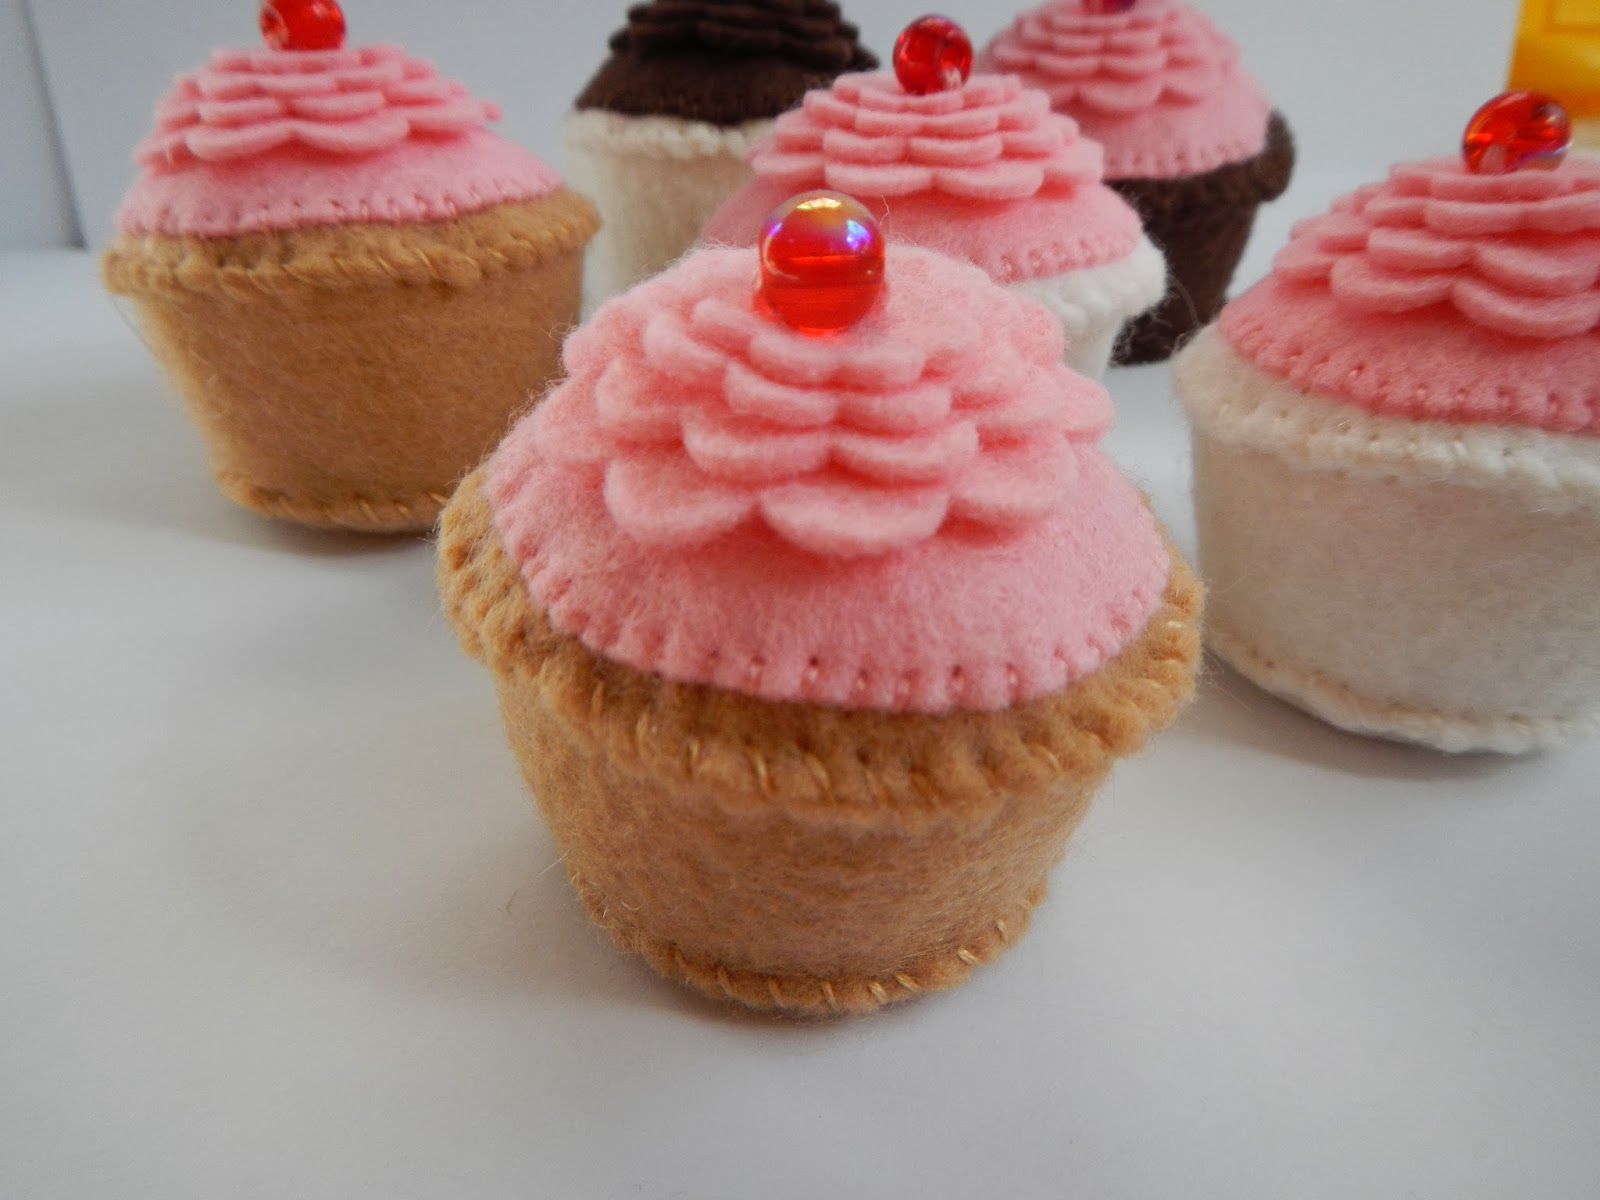
Felt Cupcake Pattern

I have made a huge stash of these and enjoy giving them out to people for their birthdays!  Of course they also go great with a felt Turtle or a felt Inchworm too!


I used wool felt for these.

Sorry no in process photos but pretty straight forward.


Trace pattern onto Freezer Paper.  Iron onto the felt colors of your choice.


I also cut out 2 - 1 1/4 inch card stock circle to use inside of the cupcake base to help it stand properly once you have stuffed it.

Cut out felt pieces.

Machine stitch or hand sew up the short side of the cupcake side piece.  I used about an 1/8" seam allowance.  Turn out the piece so raw seam will be inside the cupcake. 

I used small flower dies and my Big Shot to cut out 4 graduated flowers to use as "frosting".


I placed a large bead on top of my stack of 4 flowers and using needle and thread, sewed through all the layers a couple times.

Then hand sewed the flower stack onto the cupcake frosting top.

Next whip stitch the frosting layers onto the cupcake top.

Now sew the cupcake top to the cupcake side using a whip stitch.

Sew cupcake base to cupcake side, leaving a small opening to stuff the cupcake.

Once cupcake is stuffed, slip in 2- 1 1/4 inch cardstock circles that have been glued or taped together.  This helps it stand upright and keep a flat bottom.

Sew the cupcake base closed.

 
Evelyn the Inchworm is a pattern from the book  "Wee Wonderfuls". 


Felt Turtle pattern can be found here.


08 January 2014

Felt Harry Potter

There is a lady in Spain who makes Harry, Ron and Hermione felt dolls.  I wish I could afford to buy all three from her!  But I had to settle and make my own.


K loved hers and her classmate who is a huge Potter fan, loved his as well!

19 December 2013

Oreo Elf Shoes

Made some of these cute elf shoes, using red Oreos as the "tights".  They come together real quick.  Hardest part is finding the red Oreos!


I found the template here.  I decided to use pom-poms instead of bells for time sake.

Merry Christmas!


17 November 2013

Kiss Christmas Tree

Such an ingenious craft!  I am so glad I stumbled across this.  Perfect small gift to pass out this Christmas!  Kisses and Nugget bars.

Here is the great tutorial for this chocolate tree craft.  Click here.


Very easy to assembly line these.  I whipped up a lot this weekend.  Some people are just so amazing in their imagination and putting it out there for all to try!  Thanks Brenda Q.

16 November 2013

Felt Mayflower Boat

I saw these Mayflower boats in the Pottery Barn catalog about 3 years ago.  I knew right away I wanted these on my Fall decoration table and for the table on Thanksgiving day.

The pictures are really bad since we haven't seen the sun in days.

I made my own pattern and used wool felt to whip these up.  You can sew these different ways to save time as well.  Blanket stitch the sides or use your sewing machine.  The bottom has to be whipped stitch but it's quick and easy.


I bought some wooden spools and dowels at Hobby Lobby.  I stuffed a tiny bit of cotton into the spool before inserting the dowel for a nice snug fit.  Then painted it brown.


I fill the base of the boats with whole coffee beans.  I never drink coffee but I just love the smell of coffee beans!  Makes the kitchen smell so good.  The beans add weight and also hold up the sail.  You could  save a lot of money and just buy a bag of black beans also.


I have a couple sails made of vellum paper and the other 2 out of shimmer/pearl paper.

I included this years menu on one of the larger boats to set by the buffet table.


The large boat base is about 8 inches long and 5 inches high in the rear.  The large sail is 8 inches long by 6 inches wide. 

Here is the pattern for the large boat.


Cut out the pieces and sew up the sides first (whip, blanket stitch or sewing machine), then whip stitch the bottom piece into place.


Enjoy and Happy Thanksgiving!